11 Aug The Complete Lightroom Workflow
Introduction to the Complete Lightroom Workflow
Over the last few years, I have worked to develop a rating and labeling system that could be integrated into my complete Lightroom workflow. This workflow is based on research of several different photographers’ workflows, including the Workflow Smart Collections by John Beardsworth. You can download a Lightroom catalog containing my smart collections here (right click, and choose ‘save as’ to save the zip file to disk). Download a trial of or buy Adobe Photoshop Lightroom here.
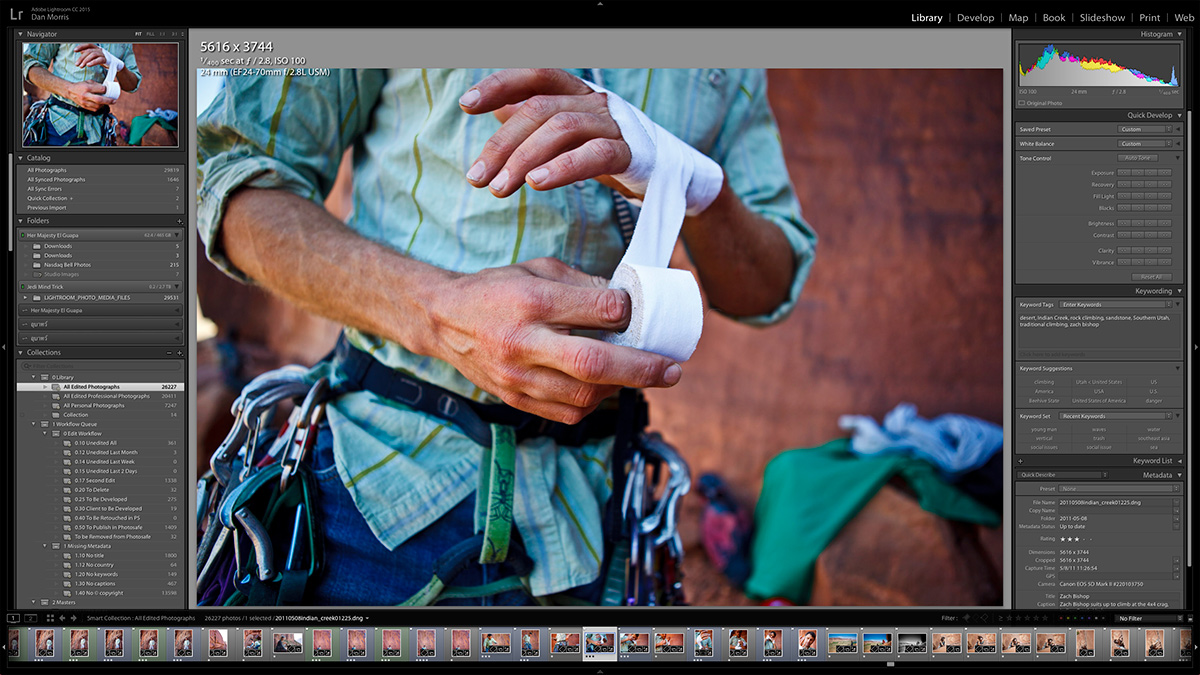
I designed this step-by-step workflow to help me manage my professional and personal photographs and video in one catalog. All my photos and video, regardless of their origins (iPhone, 5D MK II, GoPro) are imported into this catalog. I chose the “pick flag” as the basic editing unit. Unflagged images are considered unedited. “Rejected Flag” images are to be deleted. Only images with pick flags will move on to the next workflow step (note that pick flags added in a quick collection are specific to the quick collection only!).
Once images have pick flags, they are further sorted with ratings. I have chosen the following standard for my catalog rating system:
- ★ = To Archive (images that I want to keep but not develop, i.e. multiples of a better shot that I want to archive for safekeeping)
- ★★ = Client Images to be Worked on (Images that I want to develop that are specific to a paid client shoot, i.e. images that the client would think are great, but I would not include in my stock library)
- ★★★ = Images to be Worked On (Images that I plan to spend time developing /processing in Lightroom, normally only images I think have a chance to sell.)
- ★★★★ = Outstanding Images (Truly great images. Be selective!)
- ★★★★★ = The Very Best (your very best, portfolio quality images only)

- Red = Personal Photography
- Yellow = DNG/RAW files I intend to retouch in Photoshop
- Green = DNG/RAW files that have been developed in Lightroom, are finished but have been retouched in Photoshop (Like negatives for master PSD or TIFF files)
- Blue = Master images (Final, developed DNG/RAW master files that will not be retouched in Photoshop and all PSD/TIFF files that were retouched in Photoshop)
The Complete Lightroom Workflow in Use
Once you understand the rating and labeling system, you are ready to import the catalog file you downloaded into your catalog. In Lightroom, Navigate to “File –> Import from catalog.” In the subsequent dialog box, choose the Lightroom catalog file you downloaded above in this post. Lightroom will add the smart collections necessary for this workflow to your catalog. You will note numbers in front of the collection set and smart collection names. These allow for ordering of the smart collections and sets.
 The Library collection set contains 3 smart collections. “All Edited Photographs” (flagged, rating ≥ 1 star) is a quick way to see or search every photo in your library that has been edited. “All Edited Professional Photographs” (flagged, rating ≥ 1 star, label ≠ red) contains all edited photos, but excludes your personal photos. All Personal Photographs (label color = red) is self explanatory.
 The Edit Workflow collection set contains 9 smart collections to help you manage your editing, developing and Photoshop retouching. “0.10 Unedited All, 0.12 Unedited Last Month and 0.14 Unedited Last Week” (pick flag ≠ rejected, pick flag ≠ flagged, label color ≠ red) contain all images that have not yet been edited (there is an additional, obvious date filter in the latter two). To make a first edit of your photos, select one of the “Unedited” smart collections. Hit “Tab” on your keyboard to hide the develop panels in Lightroom. Then hit “L” twice to darken the screen around the image. Now you can hit “P” to assign a pick flag to an image or “x” to reject an image. If an image is not of professional value, only personal, hit the “6” key to assign the red, “Personal Photography” label. Any of these keys change the images unflagged state, and it is immediately removed from the “Unedited” smart collections. This stage of editing moves very quickly.
Once you have finished your first edit, you can move on the the “Second Edit” smart collection (pick flag ≠ rejected, pick flag = flagged, label color ≠ red, rating < 1 star). Here, I give images a star rating as delineated above by hitting the “1” key to the “5” key as needed. Again, once you select a rating, the image is removed from the smart collection (I may also reject additional photos in this step). The “To Delete” (pick flag = rejected) collection is perhaps a bit redundant, as hitting “command delete” will show all rejected images. Still, it is nice to be able to review your rejected images before you delete them from the computer.
 The “To Be Developed” (pick flag = flagged, label color = none, rating ≥ 3 star) contains all images I would like to work on. Once an image is developed, I decide if I wish to retouch it further in Photoshop, or simply make it a master file. If I plan to retouch it in Photoshop, I hit the “7” key, giving it a yellow color label and sending it to the “To be Retouched in PS” (pick flag = flagged, label color = yellow, rating ≥ 3 star) smart collection. If I feel the photo is done and doesn’t warrant Photoshop retouching, I hit the “9” key, giving the photo a blue “Master” label and sending it to the appropriate “Master File” (pick flag = flagged, label color = blue, rating ≥ 3 star, file type = ) collection depending on the filetype. Here, the smart collections are organized by a filter that selects for file type.
The only tricky step in the complete Lightroom workflow follows from the “To Be Retouched in PS” collection. Here, I can see all the images I plan to retouch in Photoshop. Right click on one image and choose “Edit in Photoshop.” This will cause Lightroom to generate a copy for Photoshop. Once you complete your retouching in Photoshop, save the file and quit Photoshop. In Lightroom, you will now see two versions of your image – one DNG/RAW (original) and one TIFF/PSD (retouched). Select the original DNG/RAW file and hit the “8” key to give the image a green, “Retouched in PS” label. Select the TIFF/PSD file and hit the “9” key to give it a “Master File” label. Now, when you view the two files in the “All Edited Photos” smart collection, you will see the green original next to the blue, finished master file!
 You will notice there are a number of other collection sets that are contained in this workflow. The “Missing Metadata” set includes a series of smart collections that tell you when you have Master Files (blue label) images that are missing titles, keywords, country or captions. The Stock / Archive set contains smart folders I use to manage my content with stock agencies (feel free to delete these collections if you don’t need them). The Photosafe set contains collections that pertain to the Photosafe Lightroom plugin by Jeffrey Friedl. This handy plugin allows you to “lock” your images so they can’t be accidentally deleted from Lightroom.
 The “Video” and “Personal Pix” sets are pretty self explanatory. I manage my videos much in the same way as the photos. The personal photos are sent to the collection in the initial edit I discussed above. Once the images have the red, “Personal Photography” label, they appear in this series of smart collections where I can assign ratings (I only use ratings on personal photos to identify the real stand outs). Once I give a personal photo a rating, it is considered finished. Usually, I just make sure the personal photos have keywords (so I can find them in the future). The “Smart Collections” set is default with Lightroom. I have not yet found a way to delete this set. If you do, please let me know!
Donate
A great deal of time and effort went into creating this workflow and subsequent post. If you enjoyed this post and find it useful, please consider a donation! Any amount helps. Thanks for reading!
Austin Strand
Posted at 13:30h, 30 MarchHey Dan, Just a quick question. If I wanted to adopt your system, and download your catalog structure but already have a catalog in operation, whats a good way to get going in your system? should I start from scratch and then import all of my photos and work through them? (luckily I started a new catalog recently so I would only have 1500 photos to re organize into your system. I have edited and finished items in my catalog already, will they still be edited? and how do i get them into their proper place?
thanks, and sorry if this was alot of questions at once
Austin
JulietteLCD
Posted at 07:47h, 01 JanuaryHi, thanks for posting this article, unusual in its detail and clarity. I was just wondering if you could clarify one point – how do you actually organize the events themselves, as in “shoot X” or “X’s wedding” or “X concert”? Do you use the keywords for this, maybe adding that title as a keyword to all photos in the shoot, or do you use the Folders, properly named and dated, or a set of dumb Collections? Or something entirely different? Just asking as for the moment I create a dumb Collection for each event/shoot, but as I would like to try using more smart ones the way you do, I feel this could end up getting messy…
Using Smart Collections to manage an Adobe Lightroom workflow
Posted at 15:02h, 27 July[…] Dan Morris complete lightroom workflow […]
Nick Church
Posted at 05:30h, 12 JanuaryHi Dan, I have posted the workflow process I use to handle my wedding shoots:
http://www.nickchurchfineart.co.uk/2016/01/10/wedding-workflow-lightroom/
Peter
Posted at 20:23h, 29 DecemberThanks for this post Dan, it’s really helpful for someone just starting out.
Quick question – how do you cope with project management?
You say in the forward that you can use this setup to manage both personal and professional editing, but when you’re working on multiple projects at a time (or have a big backlog of personal requests!), how do you manage them before (or during) the editing stage?
I’m thinking about how a big mixed bunch of “Second Edit” photos would look, with various projects in there.
I may be missing an obvious step (as I’m really new to LR) but any help would be greatly appreciate.
Thanks.
Dan Morris Photography
Posted at 13:19h, 24 MarchHi Peter –
I wish I could answer that question for you. Without knowing more about your workflow, it is hard to comment. I would suggest that if you are unable to keep up with a backlog of unedited images, perhaps it’s time to hire an assistant? 🙂
You can always work directly from a specific project folder in Lightroom, using many of the same techniques, if you only wanted to flag/rate images from that specific project…
Best of luck,
Dan
My workflow in Lightroom - A Clockwork Berry
Posted at 05:47h, 16 November[…] The complete Lightroom workflow (Dan Morris) […]
Dave
Posted at 14:31h, 15 SeptemberHi Dan
O.ve just stumbled across this and it’s great. I’m pretty new to lightroom, but it makes sense. Catalogs is a new concept for me but i think i understand it. The bit that hasn’t been covered in this is the bit before Lightroom, i.e from shoot to hard drive. I was just wondering how your folder structures look on your hard drive. i.e as a hobbyist, i find that when i’m out with my camera i take quick snaps, personal photos and what i like to call ‘practice professional photos’. So the photos on my camera card aren’t organised into shoots as such. They’re already a bit of jumble. So do you take time organising you camera imports on your hard drive before going anywhere near lightroom?
Dan Morris Photography
Posted at 13:23h, 25 SeptemberThanks for the message Dave.
Unfortunately, no system is perfectly adapted to today’s digital world. I would recommend that you order and organize your photos no matter what, whether practice pro photos, or just snaps.
When importing en masse from a device such as an iPhone, with mixed dates and events, I use the catchall folder structure “date-miscellaneous-device.” If possible, keyword and organize the individual photos after import within your catalog. This will allow for you to move their folder later, or simply organize them using smart folders, labels and ratings.
Alternatively, you can use a separate catalog for such imports.
Good luck!
Dave Buckley
Posted at 16:44h, 10 MarchBrilliant, thanks Dan, I’m happy with the organisation of my photos, the only thing i’m unsure of now is how your smart collections work. Are they folder dependant? Or will clicking on ‘Unedited’ for example, show me every unedited photo on my hard drive, or will it just show me the photos in the shoot folder I’m currently viewing in lightroom? The answer to this is the only missing piece in my brain now 🙂
My folder structure is like this ‘PHOTOS > PERSONAL > 2015 > CHRISTMAS’ for example, when in Lightroom, I only want the ‘CHRISTMAS’ folder visible/imported, so I only need to worry about those photos. The idea would then to use collections to organise like you have above. Once finished editing these pics, the Christmas folder would be gone from Lightroom and i’d move onto my next folder ‘SUMMER HOLIDAY’ for example. I’d then repeat the process for these photos. My issue is whether if I then click on unedited in smart collections, would it show me photos that weren’t edited in the CHRISTMAS shoot as well as the SUMMER HOL shoot, or just the ones in the SUMMER HOL shoot as that’s the currently selected folder?
Bit long winded but we got there
Dan Morris Photography
Posted at 11:37h, 08 AprilHi Dave –
If you use the template I uploaded, “Unedited” will show you all unedited photos in the entire database. You can review the smart folder settings and adjust them to your liking within Lightroom.
Your Xmas plan could work, but would require some customization of your own library. You could do something similar by selecting the folder. Within the Xmas folder, you could filter for the same albums. Personally, I think simpler is better.
The system above will keep you on top of all of your edited and unedited images…
I hope that helps!
Dan
Kenneth Younger
Posted at 10:07h, 15 AugustHave you changed any of this workflow since LR came out with Smart Previews? Such as, do you only build smart previews for certain ranks?
Dan Morris Photography
Posted at 17:15h, 18 AugustHi Kenneth –
Thanks for your comment.
I haven’t changed this workflow to incorporate smart previews as I use Lightroom for the iPad to do editing. I then return to my primary workstation for color correction and further processing.
If I really need to be able to work on a set of images, I just export them as a catalog and take them with me.
Hope that helps.
Dan
Pavel
Posted at 04:01h, 15 JuneThank you, it helped
Omar
Posted at 13:46h, 19 NovemberHeya Dan, this tutorial is awesome and Im implementing it in my workflow, but I have some doubts about how the Portfolio part works…
Like for example: “Publish Collection > Contains All > Portfolio_Portrait”
How do I make my portraits appear in that smart collection?
Thanks in advance…
Dan Morris Photography
Posted at 22:41h, 19 NovemberHi Omar –
Thanks for your comment.
The portfolio section is open to interpretation. The hard drive publish collection doesn’t allow for spaces between words. Therefore, I’ve used an underscore. Additionally, since I use these publish collections to add the photos to my iphone, I’ve included “Portfolio” at the beginning of each portfolio collection. This allows for easier location of your portfolio on the iPhone.
I believe the smart collections you are referring to looks at my Porfolio_Portrait hard drive publish collection. If I put images into that publish collection, they will appear in the portfolio smart collection you are referring to. On reflection, it now seems this may be a bit redundant. I will update the workflow to remove this confusing part in the near future.
I hope this answers your question!
Best,
Dan
Brandon
Posted at 18:52h, 15 NovemberAwesome workflow! Thank you!
Question: Does this only work with the entire catalog or can these smart collections be used with individual folders/jobs at a time?
Thanks again!
Dan Morris Photography
Posted at 01:44h, 16 NovemberHi Brandon –
I’m not sure I understand what you mean. When I am working remotely, I create a new catalog with the same smart folder setup. When I return back to the main computer, I just import the small catalog to my main catalog. I hope that answers your question!
Dan
arnold
Posted at 09:11h, 30 MarchHi Dan, thanks for your reply, i having problem saving the zip file to my disk it says “the download cannot be saved because an unknown error occured.” I don’t know if it’s just my computer or there’s a problem with the zip file. Would you mind checking again the file? thank you again
Dan Morris Photography
Posted at 22:50h, 19 NovemberI just downloaded the file without any trouble. I was also able to unzip it. Perhaps it is something with your internet connection or computer settings? I’m sorry I can’t be of more assistance!
Dan Morris
RL
Posted at 17:34h, 29 Marchhow can i import this file to Lightroom?? anyone?
Dan Morris Photography
Posted at 01:16h, 30 MarchGo to your menu: File >> Import from another catalog. Choose the catalog you downloaded with the smart folders. They should import into your catalog. Be sure to back up your catalog first as always before making any changes. Good luck!
Dan Morris
wedding photography
Posted at 19:27h, 30 JanuaryLove the Step by step directions for such a complex program.
Sam23
Posted at 02:17h, 08 NovemberThank you so much for sharing this. I’ve been struggling to find a way to sort out the mess in my current Lightroom-catalog for ages. This is a great help.
JTI
Posted at 07:49h, 06 NovemberDan,
This is a fantastic post. Posts like these are what make the internet valuable. I have been using the above advice to get my workflow pulled together better. It’s awesome!
– JTI
isuadam
Posted at 10:15h, 15 AugustThis is going to save me so much time. I just hit 10,000 in my Lightroom catalog and my god I have a mess. This is perfect!